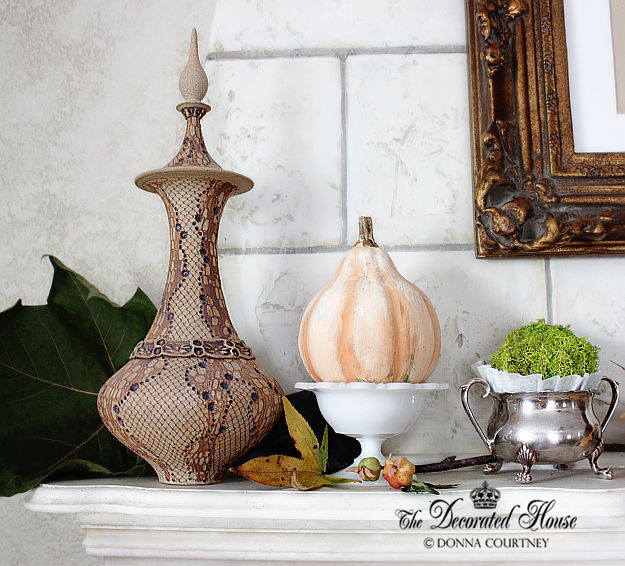
I think the lovely velvet pumpkins are still a wonderful
addition to our Fall decorating. The instructions that I posted a
while ago is still one of the easiest ones to make.
Although I have seen some highly embellished, and some
imported ones of China or wherever, to me to the simplest handcrafted ones
you can make yourself are still the nicest.
____________________________________________
How to Make Plush and Pretty Velvet Pumpkins:
It's getting to be that time of year again! Here is an early Fall Project
you can make now, and use through Thanksgiving.
You can find so many tutorials for making these pretty velvet pumpkins, it didn't seem necessary to write another one in great detail with step by step pictures. Pinterest has lots of examples for DIY pumpkins and they are mostly the same. I have a bit different way of making them and I'm going to share that with you along with some finished pictures of course!
It was tough finding velvet when I made these! I guess there just isn't much demand. The type of fabric the companies use who make these commercially, and sell for big bucks, is silk velvet. You can order it online, if you cannot find it in the store. But one of the fabric stores had a nice stretch velvet in cream, off-white which was mainly what I wanted anyway, and that is what I used.
Close up of Stem and Ruching Details.
Inside my pumpkin is one of those cheap dollar pumpkins. Those things are pretty ugly. They are easy to spot because they have bulky seam running across them. Unless you decorate them in some way to cover it, they always look odd. However, used as the inside center of my new velvet pumpkin they work great!
Here is my method of a less floppy pumpkin. But it is equally as plush!
1. Start with a cheap faux pumpkin, and cut a circle from your fabric to cover the whole thing, plus some extra for the bulk that you are going to add. Remember you can always cut it smaller, but you can't make it bigger once it is cut.
2. Some of the more expensive velvet pumpkins have plastic (doll making) pellets inside. This is not my choice if there are kids or dogs around who might get them.
The best alternative that I found is to use beans instead. I used dried lentils and dried black beans. Both were equally good for this purpose. You can find large, very inexpensive bags of beans at both costco and bj's.
3. Put your faux pumpkin in a plastic bag; I used a gallon size zip lock bag. Then cut off the zip part of the bag, and tape the folds of the edge of the bag up around the pumpkin to a more round shape so that the bag will lay more flatly against the pumpkin. But leave the bag open enough to put in the beans.
4. Now fill up the between the plastic bag, and around the pumpkin, with the beans. Move them around so that you have a layer of beans all around the pumpkin.
Then tie up the plastic bag with a baggie tie around the pumpkin and the beans.
5. Take the circle of fabric, and sew a simple basting stick about 1/4 inch from the edge all the way around. Use a double thread so you when you pull, it will be less likely to break.
6. Gather the thread around the edge, making a sack or bag for the pumpkin. Leave it open enough so that the pumpkin will fit inside.
7. Put the bean-bag-pumpkin inside the center, and continue pulling the gathering thread until it is closed and then sew it from side to side to close it tight. Now you will have a lovely ruching at the top which you can adjust after you tie off the thread.
8. Now you can play with the beans and pinch the velvet and beans to make ribs.
9. Hot glue, or regular glue, a real pumpkin stem on the velvet pumpkin. Be sure that has been thoroughly dried. (Do not store real pumpkin stems you collect and dry in a plastic bag unless they are very, very dry, or they will mildew.)
So now you can see that by doing your pumpkins this way they have a little different look. I like to make pretty ribs, and have them stay that way.
The stem is real, but I dry brushed some lime green on it instead of leaving it all brown. See the previous post for how to make a really pretty stem from air-dry clay.
You'll notice that my pumpkin is not floppy. It holds it shape exactly. If you want a floppy version, most of the tutorials I found make them so. Some used polyester batting inside and nothing that holds the shape like the faux pumpkin and the beans. Those can be nice as well, it just wasn't the look I was after.
See Y'All Soon~
Donna

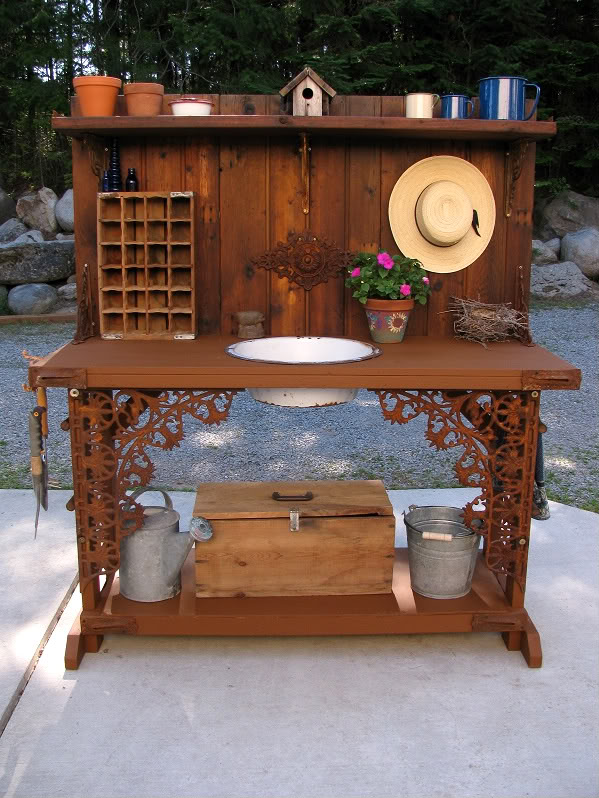 An oldie but a goodie to start off Spring!
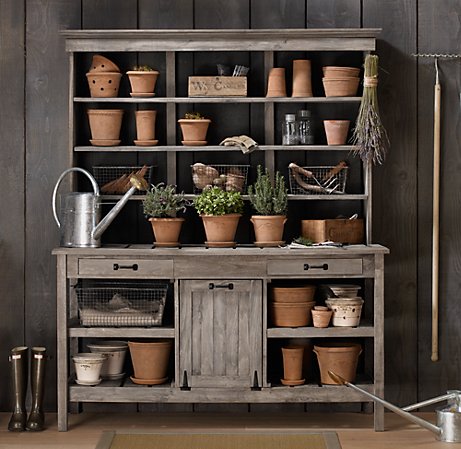 Restoration Hardware had the one above for about $900. I think you could make something like this one fairly easily. I'm surprised I didn't find any pictures of people making their own knock-offs. One thing that was not easily noticeable on it was that it had no back. This is the gray wall behind it showing through the shelves.
 A simple vinyl one. Of course this would look great with the pvc fencing, and would last a very long time as well.